Seamless Procreate Pattern Brush Set: A Smart Creative Tool with Practical Tips
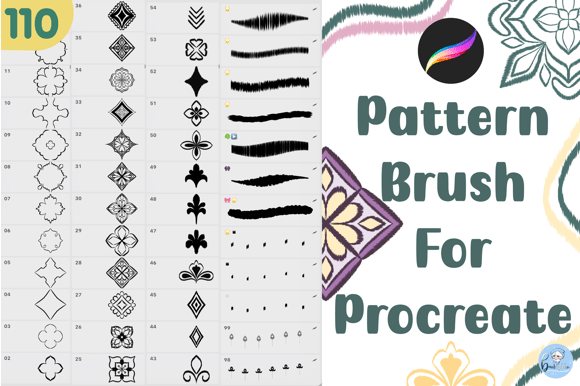
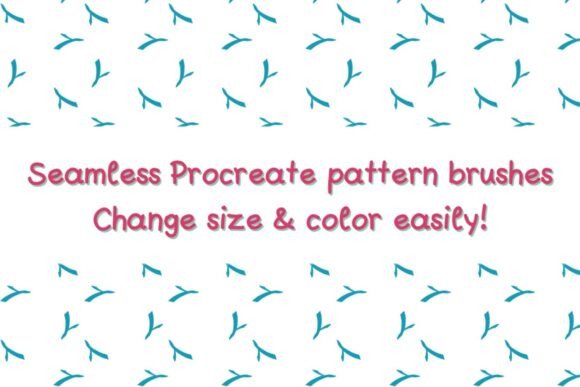
If you're a digital artist, designer, or creator working in Procreate, the Seamless Procreate Pattern Brush Set could be a valuable addition to your toolkit. This set includes 10 pattern brushes designed to repeat seamlessly, making it easier to create backgrounds, borders, textures, and decorative elements for projects like cards, invitations, digital art, and more.
Each brush in the set adjusts easily to different sizes and colors, allowing for quick customization without losing the pattern’s integrity. Once downloaded, the brushes install directly into Procreate, appearing at the top of your brush library for easy access. But while this set offers convenience and flexibility, there are a few common pitfalls users often encounter—especially when first getting started.
Misunderstanding Brush Scale and Pattern Repetition
One of the most common mistakes with seamless pattern brushes is not understanding how scaling affects the repetition of the pattern. Some users assume that increasing the brush size will automatically maintain the same pattern density, but this isn’t always the case. If you scale up a brush too much, the pattern may stretch or repeat in a way that looks uneven or distorted.
To avoid this, start with a smaller brush size and gradually increase it while observing how the pattern behaves. If the pattern starts to look stretched or misaligned, try adjusting the spacing or scattering settings in Procreate’s brush studio. This gives you more control over how the pattern repeats across your canvas.
Overlooking Color Adjustments Within the App
Another frequent oversight is assuming that you need to edit the brush file itself to change colors. In reality, Procreate allows you to recolor the pattern directly on the canvas using the color drop tool or by adjusting the hue, saturation, and brightness in real time.
This flexibility means you don’t need multiple versions of the same brush in different colors. Instead, use Procreate’s built-in color tools to experiment and match your project’s palette without complicating your brush library. This saves time and keeps your workflow organized.
Ignoring Canvas Resolution and Texture Quality
When working with pattern brushes, especially for print or high-resolution digital work, it’s easy to forget that canvas resolution affects the clarity of the pattern. Using a low-resolution canvas can make the pattern appear pixelated or blurry, especially when zooming in or exporting for print.
For best results, set your canvas resolution to at least 300 DPI if you’re planning to print your work. This ensures that the pattern maintains its crisp edges and clean lines. If you're creating for digital use, even a standard 72 DPI may be sufficient, but always consider the final output when choosing your canvas settings.
Installing Brushes Incorrectly or in the Wrong Order
Some users struggle with installation, especially if they’re unfamiliar with how Procreate handles brush imports. The Seamless Procreate Pattern Brush Set comes in a zip file containing 10 brush files. It’s important to open the zip file first, then tap on each .brush file individually to import them into Procreate.
One common mistake is trying to open the zip file directly within Procreate, which won’t work. Instead, use your device’s file manager to extract the zip, then open each brush file. Once imported, the brushes will appear at the top of your brush library under a new set. If they don’t appear, double-check that you’re tapping the correct file type and that Procreate is updated to the latest version.
Using the Wrong Layer Settings for Pattern Effects
Patterns work best when applied on separate layers, especially if you plan to adjust colors, opacity, or blending modes later. However, many users apply patterns directly on the same layer as their main artwork, making it difficult to edit or remove them without affecting the rest of the design.
To maintain flexibility, always place pattern elements on their own layers. This allows you to adjust the pattern independently—whether you want to change the color, reduce opacity for a subtle effect, or apply blending modes like Multiply or Overlay for creative results.
Not Testing Patterns Before Finalizing the Design
Before committing to a pattern for your final design, it’s wise to test it in a small area first. Some patterns may look great at a small size but become overwhelming when scaled up or repeated across a large background.
Create a test square or swatch to see how the pattern behaves in different contexts. This helps you avoid surprises later, especially if you're preparing artwork for clients or print. It also gives you a chance to tweak the brush settings for optimal spacing and alignment.
Comparing Brush Sets Without Considering Use Case
When shopping for pattern brushes, it’s tempting to compare sets based on the number of brushes included. However, the real value lies in how well the patterns suit your specific needs. The Seamless Procreate Pattern Brush Set offers a curated selection of 1–10 patterns that are versatile enough for a variety of projects, from greeting cards to social media graphics.
Instead of focusing solely on quantity, consider the types of designs you create most often. If you frequently work on invitations or digital scrapbooks, look for patterns that are decorative but not overly busy. For branding or background work, simpler geometric or abstract patterns might be more useful.
Choosing the Wrong File Format or Source
Before downloading any brush set, ensure you're getting the correct file type—specifically, .brush files that are compatible with Procreate. Some sellers may offer brushes in other formats or compressed folders that aren’t properly extracted, leading to frustration during installation.
Always download from trusted sources or verified sellers who provide clear installation instructions. If you encounter issues, reach out to the seller for support before leaving a review—many creators are happy to help with technical questions or file replacements.
Maximizing the Value of the Seamless Procreate Pattern Brush Set
To get the most out of this brush set, consider combining the patterns with other Procreate tools like clipping masks, alpha lock, and layer blending. These features allow for more creative control and can turn a simple pattern into a dynamic design element.
For example, applying a pattern over a gradient using a clipping mask can create a textured background that’s both colorful and visually interesting. Or using alpha lock on a drawn shape and filling it with a pattern brush can help you create consistent, custom-shaped designs without manual repetition.
By understanding how the Seamless Procreate Pattern Brush Set works and avoiding common mistakes, you’ll be able to incorporate patterns into your work more efficiently and creatively. Whether you're a beginner exploring digital art or a professional designer looking for time-saving tools, this set offers a practical way to enhance your Procreate experience.